How to Build a Gallery Wall on a Budget
Adding art-gallery sophistication to your home with a selection of a few intentionally selected art prints.
A gallery wall is one of the easiest ways to completely change how a room feels. What starts as a blank wall can quickly become something layered, personal, and full of character. The best part is you don’t need a big budget to get there. Some of the most striking gallery walls aren’t expensive; they’re just thoughtfully put together.
When you focus on a few key ideas, like layout, cohesion, and how your pieces relate to each other, you can create something that looks intentional from the start. It’s less about how much each piece costs and more about how everything works together. With the right approach, you can build a budget gallery wall that feels curated, balanced, and genuinely yours, something that looks like it evolved over time rather than being thrown together in an afternoon.
Key Takeaways
- A cohesive budget gallery wall comes down to curation and layout, not cost.
- Planning your layout before hanging saves time and avoids unnecessary holes.
- Consistent framing instantly makes mixed prints feel intentional.
- Mixing print sizes adds rhythm and visual interest.
- Thoughtfully selected art prints can give you a high-end look without the cost.
- The centre of your gallery wall should sit at eye level, around 57 to 60 inches.
Plan Your Budget Gallery Wall Before You Pick Up a Hammer
If you skip the planning stage, you’ll almost always end up redoing your gallery wall. Taking a bit of time up front makes the whole process smoother and gives you a result that feels considered instead of rushed.
Before you hang anything, focus on your layout. This is the step that makes the biggest difference, especially when you’re building a budget gallery wall and want everything to feel intentional. A well-planned layout helps you balance sizes, avoid awkward gaps, and create a flow that feels natural when you walk into the room.
Try the Floor-First Layout Method
Lay your frames out on the floor in front of the wall where they’ll hang. This lets you move pieces around freely, test spacing, and see how everything works together before committing.
It’s the most intuitive approach because you can immediately see how sizes, shapes, and spacing interact. You’ll start to notice patterns, where your eye is drawn, and which pieces need to shift. Try grouping your larger pieces first, then build around them until the arrangement feels balanced from edge to edge.
Use Paper Templates for a Real-Size Preview
Trace each frame onto paper, cut out the shapes, and tape them to the wall using painter’s tape. This gives you a full-scale preview of your gallery wall in the actual space.
This method is especially helpful if your wall sits above furniture or in a tighter area. You can step back and see how everything aligns with the room, adjust spacing more precisely, and mark nail placements directly on the templates. It takes a bit more time, but it almost guarantees a cleaner, more confident final result.
Use a Gallery Wall Builder to Take the Guesswork Out
If you want a clearer sense of how everything will come together, the Artfully Walls Wall Designer makes it easy to plan ahead. You can build or adjust layouts, change frames and sizes, and see everything in proportion before you hang. It’s a simple way to land on a gallery wall that already feels balanced and cohesive, without the trial-an
Choose Art That Makes Your Budget Gallery Wall Feel Curated
The prints you choose are what give your gallery wall its personality. With a thoughtful approach, you can create something that feels cohesive and elevated, regardless of price.
Start with a Loose Theme, Not Strict Rules
A budget gallery wall feels pulled together when there’s a common thread running through it. That could be a shared color palette, a similar mood, or a consistent graphic style.
You don’t need to lock yourself into a rigid theme. In fact, the most interesting gallery walls often have variety. What matters is that there’s something subtle tying everything together, whether that’s muted tones, bold contrast, or a mix of abstract and figurative pieces that share a similar energy.
Mix Sizes to Create Movement and Flow
If every piece is the same size, the wall can feel flat. Mixing sizes adds energy, depth, and a sense of layering, making the wall more engaging.
Start with one or two larger prints to anchor the arrangement. These act as visual starting points. Then build around them with medium and smaller pieces, filling in gaps and creating a natural rhythm. This layered approach helps your eye move across the wall instead of getting stuck in one place.
Find Affordable Art Prints That Still Feel Elevated
One of the easiest ways to build a high-end budget gallery wall is to start with well-curated art prints.
Artfully Walls, for example, offers a wide range of styles, sizes, and subjects that are designed to work together visually. That makes it much easier to mix and match pieces while still keeping a cohesive feel, even if your tastes span different styles.
Choosing prints from a curated collection also removes much of the guesswork. Instead of trying to force unrelated pieces together, you’re building on artwork that already shares a visual language, which gives your gallery wall that finished, intentional look.
Frame Your Budget Gallery Wall Without Overspending
Framing is often where costs start to creep up, but it does not have to. A budget gallery wall usually works best when you decide where to spend and where to save. Instead of trying to frame every piece the same way, think about which prints you want to stand out and which ones can play more of a supporting role.
Stick to One or Two Frame Finishes
Limiting your frames to one or two finishes is one of the easiest ways to make everything feel cohesive.
Think natural wood with black or white with light wood tones. This creates a consistent visual structure across your wall, even if the artwork itself varies in style or color.
Use Standard Sizes to Keep Costs Down
Planning your gallery wall around standard sizes makes a big difference.
Sizes like 5x7, 8x10, 11x14, and 16x20 are easy to find and widely available. That means you can shop for frames across multiple price points without being locked into custom framing.
Splurge Selectively on the Pieces That Matter Most
One of the smartest ways to approach a budget gallery wall is to put more of your framing budget toward one or two statement pieces.
A professionally framed print can instantly elevate the arrangement's overall look and give the wall a more finished, intentional feel. If there is one artwork you really love, or a piece you want to anchor the whole composition, it can be worth choosing a more special frame for it. The rest of the wall can then be filled in with simpler, more budget-friendly options that still work within your overall palette.
Mix Frames for a Collected, Personal Look
Not everything needs to match perfectly. In fact, a budget gallery wall often looks better when it doesn’t.
Mixing frames from different places, while sticking to your chosen finishes, creates a more relaxed, collected feel. It makes the wall feel like it came together over time, which is often what gives gallery walls their charm.
Simple Layout Rules That Make Your Budget Gallery Wall Look Finished
No matter how much you spend, a few layout principles will make your gallery wall feel complete and intentional.
Keep the Centre at Eye Level
The centre of your gallery wall should sit around 57 to 60 inches from the floor. That’s where it feels most natural when you’re standing in the room.
Think of this as your anchor point. Even if your layout is asymmetrical, keeping the visual centre aligned at eye level helps everything feel grounded.
Keep Spacing Consistent
Aim for 2 to 3 inches between frames.
Consistent spacing is what turns a group of individual pieces into a cohesive composition. It creates a sense of order, making the whole wall easier to take in at a glance.
Anchor Your Gallery Wall to the Furniture Below
If your gallery wall sits above a sofa, console, or bed, it should feel connected to it.
Keep the arrangement about two-thirds the width of the furniture, and hang it four to eight inches above it. This creates a visual link between the wall and the room, so the gallery wall feels like part of the space rather than something floating above it.
Step-by-Step: How to Hang Your Budget Gallery Wall
Once your layout is finalised and your frames are ready, hanging everything becomes much easier.
Start by confirming your layout on the floor. Transfer it to the wall using paper templates if needed, then mark your nail or hook positions carefully.
You’ll need a level, a tape measure, a pencil, a hammer, and picture hooks or nails. Begin hanging from the centre of the arrangement and work outward. This helps you stay aligned with your original plan and keeps the overall composition balanced as you go.
Take your time with this step. Small adjustments as you hang can make a big difference to the final result.
FAQs
How Many Pieces Do I Need for a Gallery Wall?
There’s no fixed number. Most budget gallery walls use between five and ten pieces, but larger walls can handle more. Start with a core set and expand if the space allows.
What Is the Best Way to Plan a Gallery Wall Layout?
The floor layout method and paper templates are the most reliable options. Both let you experiment with spacing and placement before committing to holes in the wall.
How Far Apart Should Frames Be in a Gallery Wall?
Aim for consistent spacing of about 2 to 3 inches. This keeps the arrangement feeling cohesive rather than scattered.
What Height Should a Gallery Wall Be Hung At?
The centre of your gallery wall should sit around 57 to 60 inches from the floor, which is standard eye level for most interiors.
How Do I Make a Gallery Wall Look Cohesive on a Budget?
Focus on a consistent theme, limit your frame finishes, and mix sizes thoughtfully. Starting with curated prints, like those from Artfully Walls, makes it much easier to build a gallery wall that feels cohesive, layered, and elevated without overspending.
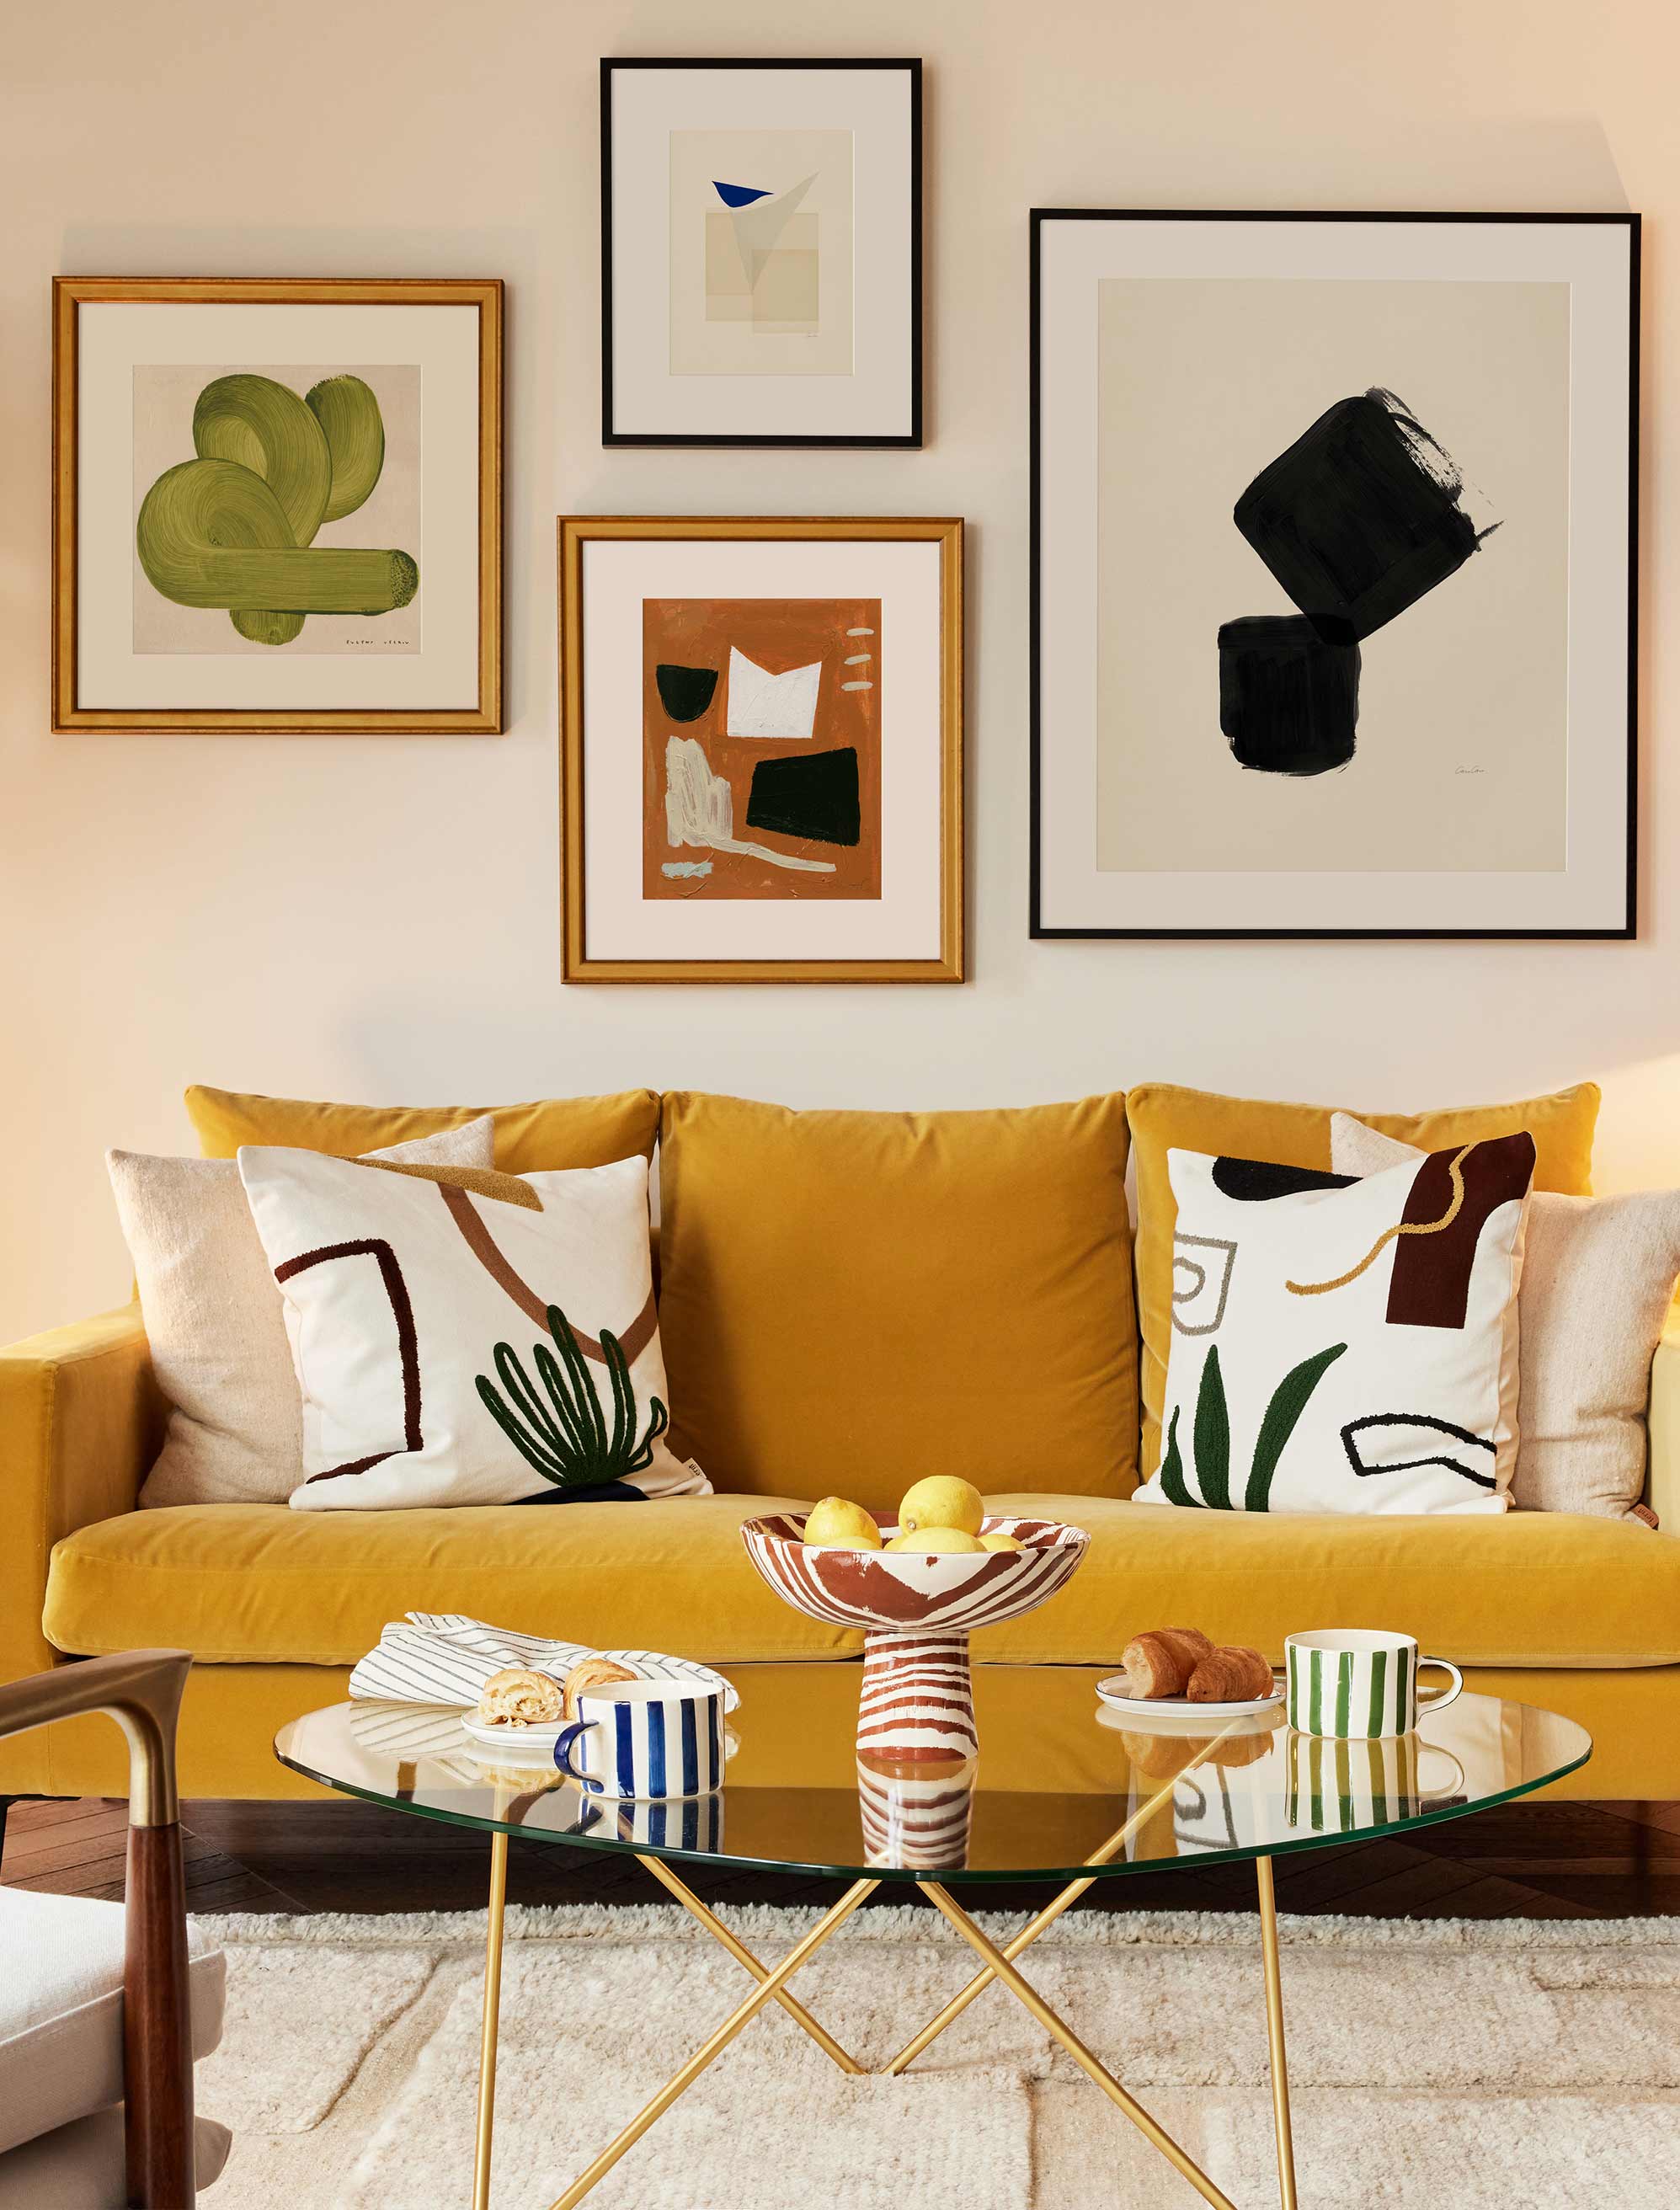
Art Included: Cactus by Evgeny Vetrov, Eclair by Shina Choi, Collage No. 24 by Karolina Szekely, Ink No. 14 by Karolina Szekely
Published on: March 26, 2026 Modified on: April 07, 2026 By: Artfully Walls
Previous: Head in the Clouds: Why Dreamy Skyscapes Are Defining 2026 Art Next: Soft Surrealism in Wall Art: The Dreamy Trend Defining 2026
